


- Level
- 17+
- Group Size
- 5
- Bosses
- 8
- Quests
- 4
- Location
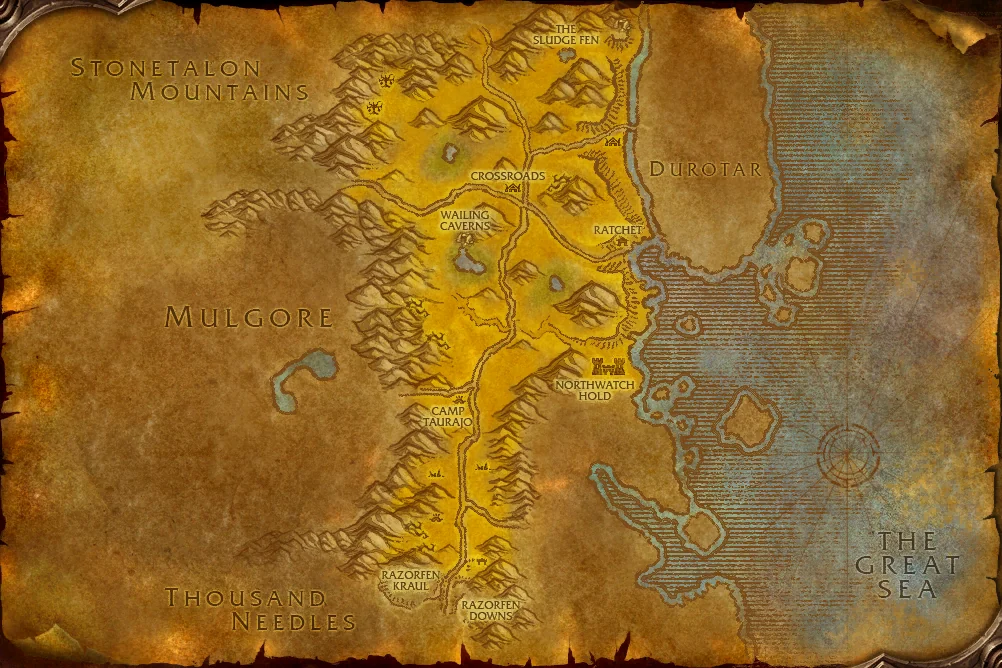
- The Barrens
- Continent
- Kalimdor
About Wailing Caverns
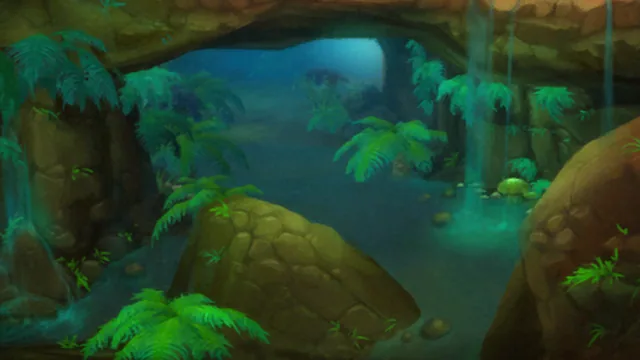
Archdruid Naralex came to the parched Barrens with noble, desperate ambition. He believed that by entering a profound trance and tapping the Emerald Dream, he could siphon the primordial vitality of ancient Azeroth into this dying savannah—re-greening the plains and refilling dry wells. Accompanied by his devoted acolytes, the Druids of the Fang, Naralex descended beneath the cracked earth to weave his massive rejuvenating ritual.
Something sinister lurked beneath the veil, waiting for precisely that door to open. Instead of idyllic nature, the Emerald Nightmare surged through the archdruid's mind, trapping Naralex in an unending, screaming slumber. The caverns' subterranean hot springs turned foul, native raptors and river crocolisks mutated into venomous monstrosities, and the Druids of the Fang awoke warped into fanatical, serpentine horrors who worship the nightmare as the true evolution of life.
The piercing wails that give the cavern its name echo for miles across the Barrens on quiet nights. Naralex cannot be jarred awake from without; adventurers must plunge into the claustrophobic caverns, execute the four corrupted Fanglords holding his mind in thrall, and stand guard during the desperate awakening ritual before Mutanus the Devourer rises from the deep.
First Run
- Located southwest of the Crossroads in the Northern Barrens; ascend the canyon rim and descend the spiral path into the weeping cavern mouth.
- Recommended for levels 18 to 22. This is the first true mega-dungeon of classic leveling: massive, winding, and unforgiving of careless navigation. Clear bag space and budget at least an hour.
- Do not jump off bridges blindly unless your guide knows the shortcuts; recovering lost party members in the labyrinthine waterways burns immense time.
- All four Fanglords (Anacondra, Cobrahn, Pythas, Serpentis) must perish before the Disciple of Naralex will begin the climactic awakening escort in the central cavern.
Veteran Notes
- Eight total bosses: the four Fanglords, plus Kresh the giant turtle, Skum, Verdan the Everliving, and Mutanus the Devourer.
- Seventeen attached quests (9 Horde, 7 accessible to both factions, 1 Alliance), with several crucial pickups located inside the cavern eye sockets above the instance entrance.
- Save mana potions and defensive cooldowns for the final gauntlet, where waves of ectoplasmic nightmare beasts precede Mutanus.
Wailing Caverns Route & Boss Strategy
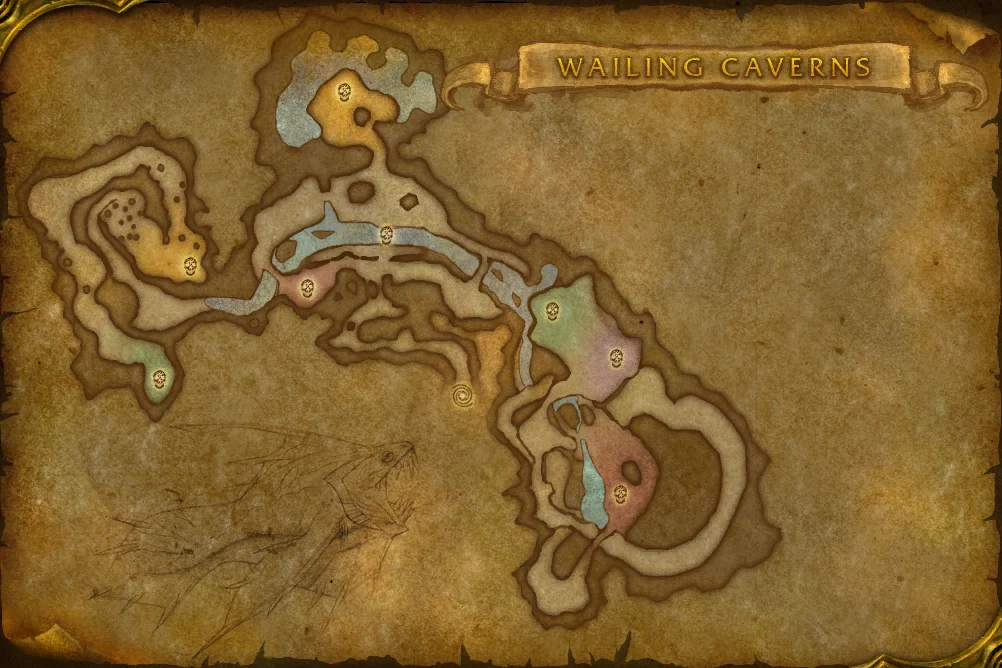
Wailing Caverns is a maze around one large central cavern, and most of the time lost here is lost to wrong turns. Run it as two loops: the central cavern and its west branch first, then the long east side, which ends at a waterfall that drops you back near the start. Kill all four Fanglords and the Disciple of Naralex at the entrance will walk you to the final fight. Plan on ninety minutes or more.
Entrance and the central cavern
- The Disciple of Naralex stands just inside the portal. Leave him there; he matters once the four Fanglords are dead.
- The tunnels open into the central cavern, with a ravine and a stream along its floor. Druids of the Fang are the trash to respect: Druid's Slumber puts a player to sleep for up to fifteen seconds, and it can land on the healer.
- Fight one druid at a time, control any others, and interrupt the sleep. Once a druid shifts into Serpent Form it can no longer cast it.
Lady Anacondra
Boss- Druid's Slumber
- Puts a player to sleep. Interrupt it or dispel it.
- Lightning Bolt
- Direct damage on one player.
- Healing Touch
- She heals herself. Interrupt it.
- She stands in the central cavern, in one of several possible spots, so you may clear a pack or two to reach her.
- Save interrupts for the sleep. A Tremor Totem or a dispel also wakes the target.
- If a second Druid of the Fang joins, control it at once: one sleep is manageable, two can wipe the group.
- She carries the first of four gems for Leaders of the Fang.
Kresh
Optional- A giant turtle that swims the ravine of the central cavern. He has heavy armor and hits hard, and nothing else: tank him and be patient.
- Optional, but he drops two shields worth the detour.
Lord Cobrahn
Boss- Druid's Slumber
- Interrupt it, above all when it targets the healer.
- Cobrahn Serpent Form
- He turns into a serpent, hitting harder and faster.
- From the ravine head west and climb the path to its end.
- Three non-elite Deviate Pythons guard him. Kill them first with area damage, then turn to Cobrahn.
- When he takes Serpent Form the healer keeps the tank high until he drops. Loot the second gem.
The east side
- Return to the ravine and take the east passage. From here the route is a one-way loop.
- The Deviate Faerie Dragon, a rare spawn on this side, comes with two Druids of the Fang and one more elite. Control one druid, burn the other, and expect heavy tank damage.
Lord Pythas
Boss- Druid's Slumber
- Interrupt it.
- Thunderclap
- Hits everyone near him hard.
- Healing Touch
- He heals himself. Interrupt it.
- A Druid of the Fang and a Deviate Shambler stand near him. Assume all three come together.
- Control the druid, kill the Shambler, and keep one player on Pythas the whole time to interrupt.
- Loot the third gem.
Skum
Optional- Chained Bolt
- Lightning that jumps between players standing close together.
- A thunder lizard past Pythas. Melee spread around him so the bolt has nowhere to jump.
- Optional and simple, with a cloak many classes want.
Lord Serpentis
Boss- Druid's Slumber
- Interrupt it.
- Lightning Bolt
- Direct damage on one player.
- Healing Touch
- He heals himself. Interrupt it.
- Beyond Skum the path reaches a ledge with a jump across a gap. Miss it and you walk the whole loop again.
- Serpentis can be pulled alone, which makes him the easiest of the four. Interrupt the sleep and loot the last gem.
Verdan the Everliving
Boss- Grasping Vines
- Roots everyone within ten yards for ten seconds, knocks them down, and deals damage.
- The giant plant right after Serpentis. He hits the tank very hard.
- Ranged players and the healer stand at full range, outside the roots.
- Always kill him: the waterfall behind him is the shortcut back to the entrance.
Mutanus the Devourer
Boss- Thundercrack
- Heavy damage to everyone near him.
- Naralex's Nightmare
- Puts a player to sleep until they take damage.
- Terrify
- Fears a player.
- Jump down the waterfall and speak to the Disciple of Naralex. He walks to Naralex's ritual stone, and the group clears anything left on his path.
- Two waves attack while he channels: elite serpents first, then a swarm of non-elite oozes. Keep the Disciple alive. If he dies or the group wipes, the event is lost until the instance is reset.
- Then Mutanus rises. Everyone who can stands at range because of Thundercrack. Wake a sleeping player with any small hit.
- He is immune to Shadow damage, so warlocks and shadow priests switch schools.
Wailing Caverns Quests
All 4 quests are picked up outside, so collect them before you head in.
Pick Up Before You Enter 4
Their quest givers are outside the dungeon. Pick them up before you enter so every kill and drop on the run counts toward them.
Leaders of the Fang
Accept at level 11HordePick up firstChain 6/6Bring the Gems of Cobrahn, Anacondra, Pythas and Serpentis to Nara Wildmane in Thunder Bluff.Pick up fromNara Wildmane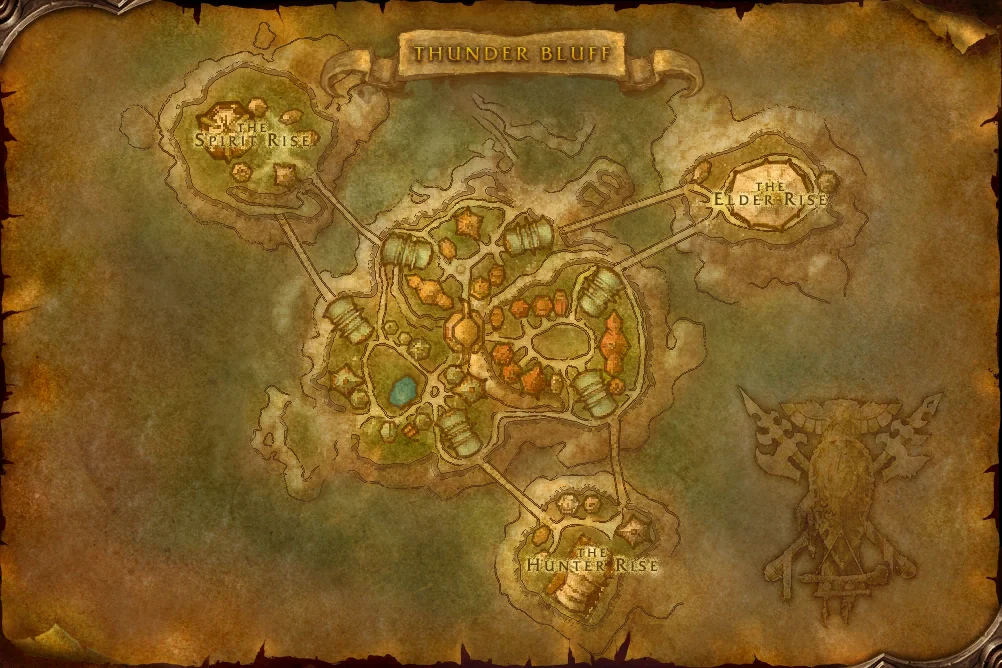
 Thunder Bluff75.7, 31.6
Quest details
 Crescent Staff
 Wingblade
 Hammerbone
Quest chainStep 6 of a 6-step chainShow all 6 stepsHide steps
- Step 1The Forgotten PoolsLevel 13 · Tonga RunetotemThe Barrens52.3, 31.9
- Step 2The Stagnant OasisLevel 16 · Tonga RunetotemThe Barrens52.3, 31.9
- Step 3Altered BeingsLevel 16 · Tonga RunetotemThe Barrens52.3, 31.9
- Step 4Hamuul RunetotemLevel 16 · Tonga RunetotemThe Barrens52.3, 31.9
- Step 5Nara WildmaneLevel 16 · Arch Druid Hamuul RunetotemThunder Bluff78.6, 28.6
- This questLeaders of the FangLevel 22 · Nara WildmaneThunder Bluff75.7, 31.6
- Accept at level
- 11
- Quest level
- 22
- Where it starts
- Outside the dungeon: pick it up first
Objectives
- Gem of Cobrahn
- Gem of Anacondra
- Gem of Pythas
- Gem of Serpentis
How to Complete It
- Pick up first
- CompleteBring the Gems of Cobrahn, Anacondra, Pythas and Serpentis to Nara Wildmane in Thunder Bluff.
Reputation
- Thunder Bluff +150
Deviate Hides
Accept at level 13Both factionsPick up firstNalpak in the Wailing Caverns wants 20 Deviate Hides.Pick up fromNalpakThe Barrens46.0, 35.7Quest details
 Deviate Hide Pack
 Slick Deviate Leggings
- Accept at level
- 13
- Quest level
- 17
- Where it starts
- Outside the dungeon: pick it up first
Objectives
- Deviate Hide ×20
How to Complete It
- Pick up first
- CompleteNalpak in the Wailing Caverns wants 20 Deviate Hides.
Smart Drinks
Accept at level 13Both factionsPick up firstChain 2/2Bring 6 portions of Wailing Essence to Mebok Mizzyrix in Ratchet.Pick up fromMebok MizzyrixThe Barrens62.4, 37.6Quest details
Quest chainStep 2 of a 2-step chainShow all 2 stepsHide steps
- Step 1Raptor HornsLevel 18 · Mebok MizzyrixThe Barrens62.4, 37.6
- This questSmart DrinksLevel 18 · Mebok MizzyrixThe Barrens62.4, 37.6
- Accept at level
- 13
- Quest level
- 18
- Where it starts
- Outside the dungeon: pick it up first
Objectives
- Wailing Essence ×6
How to Complete It
- Pick up first
- CompleteBring 6 portions of Wailing Essence to Mebok Mizzyrix in Ratchet.
Reputation
- Ratchet +100
Deviate Eradication
Accept at level 15Both factionsPick up firstEbru in the Wailing Caverns wants you to kill 7 Deviate Ravagers, 7 Deviate Vipers, 7 Deviate Shamblers and 7 Deviate Dreadfangs.Pick up fromEbruThe Barrens46.0, 35.7Quest details
 Pattern: Deviate Scale Belt
 Sizzle Stick
 Dagmire Gauntlets
- Accept at level
- 15
- Quest level
- 21
- Where it starts
- Outside the dungeon: pick it up first
Objectives
- Deviate Ravager ×7
- Deviate Viper ×7
- Deviate Shambler ×7
- Deviate Dreadfang ×7
How to Complete It
- Pick up first
- CompleteEbru in the Wailing Caverns wants you to kill 7 Deviate Ravagers, 7 Deviate Vipers, 7 Deviate Shamblers and 7 Deviate Dreadfangs.
Leads Here from Outside 13
The quests that point you to this dungeon or wrap up the story afterwards. Fit them in around your run to finish each chain.
Altered Beings
Accept at level 10HordePick up firstBring 8 Altered Snapjaw Shells to Tonga Runetotem at the Crossroads.Requires firstThe Stagnant OasisPick up fromTonga RunetotemThe Barrens52.3, 31.9Quest details
- Accept at level
- 10
- Quest level
- 16
- Where it starts
- Outside the dungeon: pick it up first
How to Complete It
- Pick up first
- CompleteBring 8 Altered Snapjaw Shells to Tonga Runetotem at the Crossroads.
Hamuul Runetotem
Accept at level 10HordePick up firstSpeak with Hamuul Runetotem.Requires firstAltered BeingsPick up fromTonga RunetotemThe Barrens52.3, 31.9Quest details
- Accept at level
- 10
- Quest level
- 16
- Where it starts
- Outside the dungeon: pick it up first
How to Complete It
- Pick up first
- CompleteSpeak with Hamuul Runetotem.
Reputation
- Thunder Bluff +25
Quest Chain
- Leads toNara Wildmane
Nara Wildmane
Accept at level 10HordePick up firstSpeak with Nara Wildmane.Requires firstHamuul RunetotemPick up fromArch Druid Hamuul RunetotemThunder Bluff78.6, 28.6Quest details
- Accept at level
- 10
- Quest level
- 16
- Where it starts
- Outside the dungeon: pick it up first
How to Complete It
- Pick up first
- CompleteSpeak with Nara Wildmane.
Reputation
- Thunder Bluff +10
Quest Chain
- Comes afterHamuul Runetotem
- Leads toLeaders of the Fang
The Barrens Oases
Accept at level 10HordePick up firstSpeak with Tonga Runetotem at the Crossroads.Pick up fromArch Druid Hamuul RunetotemThunder Bluff78.6, 28.6Quest details
- Accept at level
- 10
- Quest level
- 10
- Where it starts
- Outside the dungeon: pick it up first
How to Complete It
- Pick up first
- CompleteSpeak with Tonga Runetotem at the Crossroads.
The Forgotten Pools
Accept at level 10HordePick up firstReport back to Tonga Runetotem with your findings.Pick up fromTonga RunetotemThe Barrens52.3, 31.9Quest details
- Accept at level
- 10
- Quest level
- 13
- Where it starts
- Outside the dungeon: pick it up first
How to Complete It
- Pick up first
- CompleteReport back to Tonga Runetotem with your findings.
The Stagnant Oasis
Accept at level 10HordePick up firstReturn to Tonga at The Crossroads, after investigating the Stagnant Oasis.Requires firstThe Forgotten PoolsPick up fromTonga RunetotemThe Barrens52.3, 31.9Quest details
- Accept at level
- 10
- Quest level
- 16
- Where it starts
- Outside the dungeon: pick it up first
How to Complete It
- Pick up first
- CompleteReturn to Tonga at The Crossroads, after investigating the Stagnant Oasis.
Raptor Horns
Accept at level 13Both factionsPick up firstGather 5 Intact Raptor Horns from Sunscale Scytheclaws, and bring them to Mebok Mizzyrix in Ratchet.Pick up fromMebok MizzyrixThe Barrens62.4, 37.6Quest details
- Accept at level
- 13
- Quest level
- 18
- Where it starts
- Outside the dungeon: pick it up first
How to Complete It
- Pick up first
- CompleteGather 5 Intact Raptor Horns from Sunscale Scytheclaws, and bring them to Mebok Mizzyrix in Ratchet.
Serpentbloom
Accept at level 14HordePick up firstApothecary Zamah in Thunder Bluff wants you to collect 10 Serpentbloom.Pick up fromApothecary ZamahThunder Bluff22.8, 20.9Quest details
 Apothecary Gloves
 Heat Resistant Mitts
 Safety Boots
- Accept at level
- 14
- Quest level
- 18
- Where it starts
- Outside the dungeon: pick it up first
Objectives
- Serpentbloom ×10
How to Complete It
- Pick up first
- CompleteApothecary Zamah in Thunder Bluff wants you to collect 10 Serpentbloom.
Reputation
- Undercity +150
Trouble at the Docks
Accept at level 14Both factionsPick up firstCrane Operator Bigglefuzz in Ratchet wants you to retrieve the bottle of 99-Year-Old Port from Mad Magglish who is hiding in the Wailing Caverns.Pick up fromCrane Operator BigglefuzzThe Barrens63.1, 37.6Quest details
- Accept at level
- 14
- Quest level
- 18
- Where it starts
- Outside the dungeon: pick it up first
Objectives
- 99-Year-Old Port
How to Complete It
- Pick up first
- CompleteCrane Operator Bigglefuzz in Ratchet wants you to retrieve the bottle of 99-Year-Old Port from Mad Magglish who is hiding in the Wailing Caverns.
Reputation
- Ratchet +100
In Nightmares
Accept at level 15HordePick up firstBring the Nightmare Shard to Hamuul Runetotem on Elder Rise.Requires firstThe Glowing ShardPick up fromFalla SagewindThe Barrens48.2, 32.8Quest details
- Accept at level
- 15
- Quest level
- 25
- Where it starts
- Outside the dungeon: pick it up first
How to Complete It
- Pick up first
- CompleteBring the Nightmare Shard to Hamuul Runetotem on Elder Rise.
In Nightmares
Accept at level 15AlliancePick up firstBring the Nightmare Shard to Mathrengyl Bearwalker in Darnassus.Requires firstThe Glowing ShardPick up fromFalla SagewindThe Barrens48.2, 32.8Quest details
- Accept at level
- 15
- Quest level
- 25
- Where it starts
- Outside the dungeon: pick it up first
How to Complete It
- Pick up first
- CompleteBring the Nightmare Shard to Mathrengyl Bearwalker in Darnassus.
OLD The Glowing Shard
Accept at level 15Both factionsItem starts itTravel to Ratchet to find the meaning behind the Nightmare Shard.Use itemGlowing ShardStarts from a looted itemGlowing ShardQuest details
- Accept at level
- 15
- Quest level
- 25
- Where it starts
- An item starts it: Glowing Shard
Objectives
- Glowing Shard
How to Complete It
- Use itemGlowing Shard
- CompleteTravel to Ratchet to find the meaning behind the Nightmare Shard.
The Glowing Shard
Accept at level 15Both factionsItem starts itTravel to Ratchet to find someone that can tell you more about the glowing shard. Then, deliver the shard as you are directed.Use itemGlowing ShardStarts from a looted itemGlowing ShardQuest details
- Accept at level
- 15
- Quest level
- 26
- Where it starts
- An item starts it: Glowing Shard
Objectives
- Glowing Shard
How to Complete It
- Use itemGlowing Shard
- CompleteTravel to Ratchet to find someone that can tell you more about the glowing shard. Then, deliver the shard as you are directed.
Wailing Caverns Bosses & Loot
8 bosses wait in Wailing Caverns.
- 01Lady Anacondra
 Belt of the Fang
 Serpent's Shoulders
 Snakeskin Bag
 Snake Eye Kaleidoscope
- 02Lord Cobrahn
 Cobrahn's Grasp
 Leggings of the Fang
 Robe of the Moccasin
- 03Kresh
 Kresh's Back
 Worn Turtle Shell Shield
 Cloak of Hermitic Bliss
- 04Lord Pythas
 Stinging Viper
 Armor of the Fang
 Slither Cord
- 05Skum
 Glowing Lizardscale Cloak
 Tail Spike
 Skum's Bucket
- 06Lord Serpentis
 Venomstrike
 Serpent Gloves
 Footpads of the Fang
- Savage Trodders
- 07Verdan the Everliving
 Seedcloud Buckler
 Living Root
- Sporid Cape
- 08Mutanus the Devourer
 Slime-encrusted Pads
 Mutant Scale Breastplate
 Deep Fathom Ring
 Glowing Shard
Rare Spawns and Other Drops
- Deviate Faerie Dragon
 Firebelcher
 Feyscale Cloak
- Trash
 Gloves of the Fang
Where Is the Wailing Caverns Entrance?
- ContinentKalimdor
- ZoneThe Barrens Levels 10–25 · Horde territory
- Nearest flight pathCrossroads, The Barrens Horde · 51.5, 30.4
- Entrance46.0, 36.3
Wailing Caverns Common Questions
Where is the Wailing Caverns entrance in WoW Forever?
The Wailing Caverns entrance is in The Barrens at 46.0, 36.3 on Kalimdor. The nearest flight path is Crossroads at 51.5, 30.4.
What level do you need for Wailing Caverns?
Wailing Caverns is a 5-player dungeon for level 17–24 characters. The surrounding zone, The Barrens, is levels 10–25.
How many bosses are in Wailing Caverns?
Wailing Caverns has 8 bosses: Lady Anacondra, Lord Cobrahn, Kresh, Lord Pythas, Skum, Lord Serpentis, Verdan the Everliving, Mutanus the Devourer. The boss list on this page shows each one's loot.
What quests are there for Wailing Caverns?
This page lists 4 Wailing Caverns quests, including Leaders of the Fang, Deviate Hides, Smart Drinks and Deviate Eradication. 4 of them must be picked up before you enter, and 0 start inside; 13 more lead-in quests point you here from outside.