

- Level
- 55+
- Group Size
- 5
- Bosses
- 19
- Quests
- 10
- Location
- Eastern Plaguelands
- Continent
- Eastern Kingdoms
About Stratholme
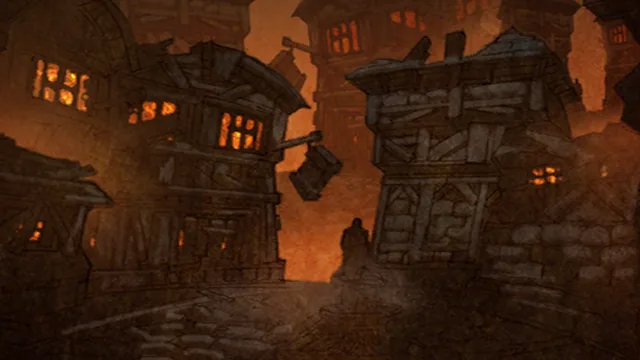
Engulfed in eternal pyres beneath the poisoned skies of the Eastern Plaguelands stands Stratholme, the tragic epicenter of Lordaeron’s fall. It was here that Prince Arthas Menethil severed his paladin vows and carried out the brutal purge of infected citizens, taking his first irrevocable step toward damnation. Today, the scorched city burns without end, transformed into the Scourge’s most heavily garrisoned fortress in the subcontinent.
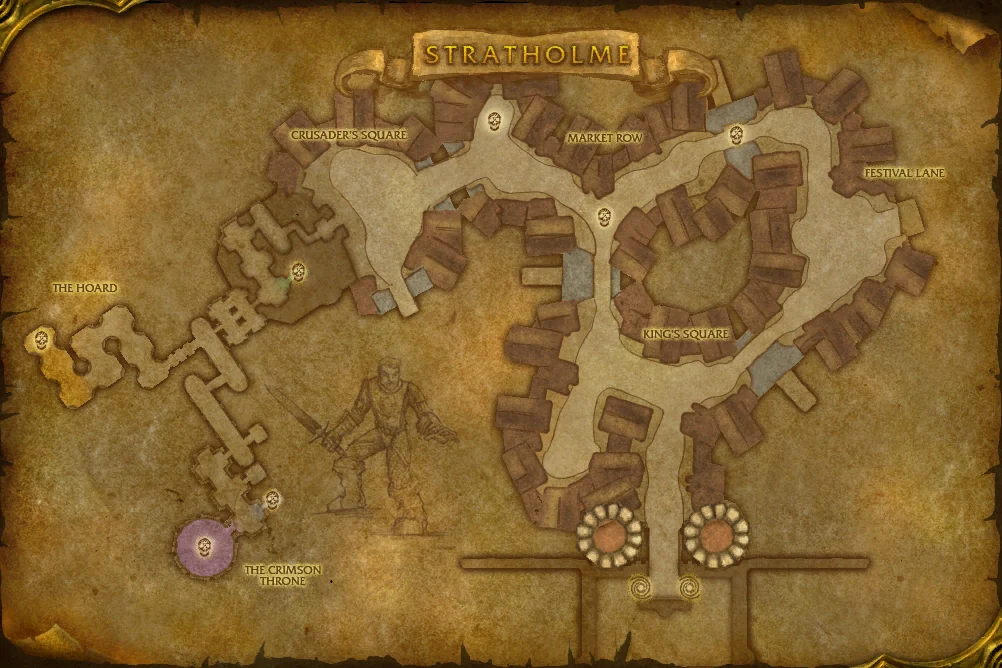
The urban sprawl is partitioned into two distinct campaigns: The Scarlet Live Side, entered through the main gate, is garrisoned by puritanical crusaders fortifying ruined town squares, blind to the fact that their revered leader, Grand Crusader Dathrohan, is actually the dreadlord Balnazzar in disguise; and the Scourge Dead Side, accessed via the service gate, where bloated abominations, wailing banshees, and crypt fiends butcher anything with a heartbeat upon the Slaughter Square.
Within the necropolis citadel at the rear sits Baron Rivendare, directing Scourge forces across Lordaeron. Breaching his ziggurat requires beating the clock in the legendary '45-Minute Baron Run' to rescue hostages before they are executed. Beyond the prestige of purging Arthas’s pyre, Stratholme holds the rarest equine treasure in classic history: the coveted Deathcharger's Reins.
About Stratholme Main Gate
The main gate opens onto burning streets where the Scourge roams among ruined houses. Timmy the Cruel stalks the square, Postmaster Malown makes his rounds, and Hearthsinger Forresten lingers among the ghosts of the city he once sang for.
Deeper in, the Scarlet Crusade holds the Scarlet Bastion. Cannon Master Willey fires on anything that approaches, Archivist Galford guards the Crusade's records, and at the end Grand Crusader Dathrohan reveals his true form: the dreadlord Balnazzar.
About Stratholme Service Gate
Past Magistrate Barthilas at the gate, three ziggurats rise over the dead streets, each held by one of the Baron's lieutenants: Baroness Anastari, Nerub'enkan and Maleki the Pallid. Destroy all three to break the seal on the Slaughter Square.
Inside, Ramstein the Gorger and waves of abominations pour out before Baron Rivendare himself steps forward, the death knight who rules Stratholme for the Lich King.
First Run
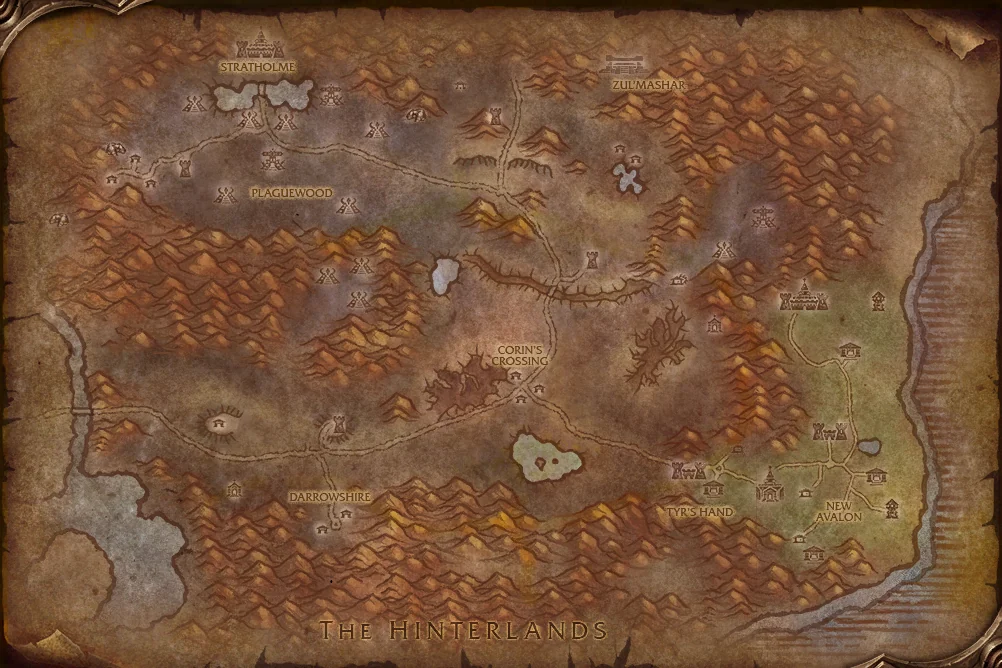
- Main gate sits on the northwest border of Eastern Plaguelands; the service gate (Dead Side) is tucked along the eastern wall and requires the Key to the City.
- Target level 55 to 60. Partitioned into 'Live Side' (Scarlet/Balnazzar) and 'Dead Side' (Undead/Baron Rivendare). Necromancers summon endless skeleton swarms if casts are not strictly kicked.
- Beware traps: stepping near human corpses across Dead Side cobblestones frequently spawns ambush swarms of crypt maggots and shrieking gargoyles.
- The Slaughter Square gauntlet is a legendary DPS check: once entered, gates seal behind you as waves of stitched abominations and Ramstein the Gorger attack back-to-back before Rivendare emerges.
Veteran Notes
- Nineteen encounters across both sides: Timmy the Cruel, Cannon Master Willey, Balnazzar (Live); Anastari, Maleki, Ramstein, and Baron Rivendare (Dead).
- Thirteen attached quests, driving the conclusion of the emotional 'In Dreams' Fordring family saga and the holy Argent Dawn token turn-ins.
- Baron Rivendare boasts a microscopic drop chance for the Deathcharger's Reins, cementing Stratholme as an eternal pilgrimage for mount collectors.
Stratholme Route & Boss Strategy
Stratholme is one burning city with two gates and two runs. The main gate leads through haunted streets to the Scarlet Bastion and the demon who leads the Crusade. The service gate leads through the Scourge's three ziggurats to the Slaughter Square and Baron Rivendare. The two meet in the middle, so a strong group can do both in one visit; most take one side, an hour to an hour and a half each.
The main gate leads through haunted streets to the Scarlet Bastion and the demon who leads the Crusade. The streets are full of side errands, postboxes, crates and ghosts, and the Bastion is a straight fight through large packs to Balnazzar. An hour to an hour and a half.
The service gate leads through the Scourge's three ziggurats to the Slaughter Square and Baron Rivendare. Each ziggurat has to be emptied before the square opens, and the square itself is three fights in a row. Bring the Key to the City. An hour to an hour and a half.
Main Gate: the Streets
- Undead fill the first streets in large packs, with patrols between them. Pull back to the gate and use every stun and slow on the runners.
- Supply crates lie all over the city. Search them for Stratholme Holy Water for Houses of the Holy; some hold a swarm of insects, so open them with the party close.
- Plagued Flesh Samples come from the undead on both sides, and Egan's Blaster frees the ghosts of the citizens for The Restless Souls.
- Skul, Hearthsinger Forresten and The Unforgiven are random spawns in these streets. Most runs meet one of them at best.
Stratholme Courier
Optional- He walks the first streets and drops three Postbox Keys. Each key opens one of the postboxes around the city.
Postmaster Malown
Optional- Curse of Weakness
- Lowers damage dealt.
- Fear
- Sends one player running.
- He appears when the third postbox is opened. Clear the street around the last box first, because undead postmen come with each box and the fear sends players far.
Ezra Grimm
Optional- Open the box of premium tobacco in the smoke shop near the gate and the shopkeeper attacks. A weak fight, and the box is the item for The Great Fras Siabi.
Timmy the Cruel
Boss- Ravenous Claw
- A heavy strike on the tank.
- Enrage
- He hits harder at low health.
- A ghoul who runs into the square before the Bastion once the Scarlet guards there are dead. Turn and pick him up at once; he reaches the healer first otherwise.
The Scarlet Bastion
- Past the square the Crusade holds every hall. The packs are large and they call for help, so pull them back through doorways and kill the healers first.
Malor the Zealous
Boss- Holy Strike
- A heavy Holy blow on the tank.
- Lay on Hands
- Heals himself to full once.
- He guards a hall with a strongbox. Expect to take his health down twice.
- Malor's Strongbox holds the Medallion of Faith. Take it to Aurius in the chapel on the Scourge side and he joins the fight against the Baron.
Crimson Hammersmith
Optional- Pick up the blacksmithing plans beside the Bastion's forge and the smith runs in to stop you. Blacksmiths need the fight; other groups walk past.
Cannon Master Willey
Boss- Summon Crimson Rifleman
- Calls riflemen to the doorway through the whole fight.
- Knock Away
- Throws the tank back.
- Pummel
- Interrupts casting.
- The riflemen are the fight. Two cannons stand in his room: pick up the cannonballs beside them and fire at each group of riflemen as it arrives. One player on cannons the whole fight keeps the room clear.
Archivist Galford
Boss- Fire Nova
- Fire damage to everyone near him.
- Burning Winds
- Fire damage over time on one player.
- Pyroblast
- A large fireball. Interrupt it.
- He stands in the archive. After the kill, burn the Scarlet Archive beside him for The Archivist.
Balnazzar
Boss- Psychic Scream
- Fears everyone near him.
- Sleep
- Puts one player to sleep.
- Domination
- Takes control of one player.
- Mind Blast
- Shadow damage to one player.
- Grand Crusader Dathrohan sits in the last chamber and fights as a paladin until about half health, then throws off the disguise and becomes the dreadlord, at full strength.
- Fight in the middle of the room so the fear finds no walls to run along, dispel the sleep, and control the dominated player.
- Take the Head of Balnazzar for The Truth Comes Crashing Down.
Service Gate: the Scourge Side
- The side gate needs the Key to the City. Abominations, banshees, crypt fiends and necromancers hold these streets; interrupt the necromancers, who raise skeletons without end.
- Three ziggurats seal the Slaughter Square. In each, a boss stands in front and five Thuzadin Acolytes wait in the room behind. Kill the boss and all five acolytes in every ziggurat. Scourge Data for The Active Agent lies inside the ziggurats.
- Stonespine, a rare gargoyle, sometimes waits near the gate.
Magistrate Barthilas
Boss- Mighty Blow
- Knocks the tank back.
- Crowd Pummel
- Hits everyone near him and interrupts.
- He stands at the service gate. Groups that come through the city from the main gate find he has fled to the Slaughter Square instead, where he joins that fight.
Nerub'enkan
Boss- Encasing Webs
- Webs one player in place.
- Crypt Scarabs
- Sends scarabs at the party.
- Pierce Armor
- Lowers the tank's armor.
- The crypt lord of the first ziggurat. Fight him outside it and kill the scarabs with area damage.
Black Guard Swordsmith
Optional- Pick up the blacksmithing plans near the ziggurats and he appears. Blacksmiths need the fight; other groups walk past.
Baroness Anastari
Boss- Possess
- Takes over one player. She leaves when that player drops to half health.
- Banshee Wail
- Shadow damage to one player.
- Silence
- Silences players near her.
- The banshee of the second ziggurat. When she possesses a player she vanishes into them: bring that player to half health carefully and she is forced out.
Maleki the Pallid
Boss- Ice Tomb
- Freezes one player solid.
- Drain Life
- Drains health from one player.
- Frostbolt
- Frost damage. Interrupt it.
- The necromancer of the third ziggurat. Keep interrupts on him and heal the frozen player.
Ramstein the Gorger
Boss- Knockout
- A heavy blow that stuns the tank and drops their threat.
- Trample
- Damages everyone near him.
- With the third ziggurat cleared the gate to the Slaughter Square opens, and it closes behind you. Abominations walk out one after another; kill each as it comes.
- Ramstein follows the last of them. Keep a second player high on threat for the Knockout.
- A crowd of Black Guard Sentries rushes in after him. Stand together and use area damage. Then the Baron's door opens.
Baron Rivendare
Boss- Unholy Aura
- Shadow damage every few seconds to everyone near him.
- Raise Dead
- Summons skeletons from the bone piles.
- Death Pact
- Consumes living skeletons to heal himself.
- Mortal Strike
- Halves healing on the tank.
- The aura makes this a race against the healer's mana. Tank him in the middle of the room.
- Kill the skeletons the moment they rise. Every one still standing when he casts Death Pact heals him.
- His head completes Above and Beyond.
Stratholme Quests
Pick up 8 quests before you head in; the other 2 start inside, so you can grab them along the way.
Pick up 7 quests before you head in; the other 2 start inside, so you can grab them along the way.
Pick up 7 quests before you head in; one more starts inside, so you can grab it along the way.
Pick Up Before You Enter 8
Their quest givers are outside the dungeon. Pick them up before you enter so every kill and drop on the run counts toward them.
Above and Beyond
Accept at level 55Both factionsPick up firstChain 3/5Venture to Stratholme and destroy Baron Rivendare. Take his head and return to Duke Nicholas Zverenhoff.Pick up fromDuke Nicholas Zverenhoff Eastern Plaguelands81.4, 59.8
Quest details
Quest chainStep 3 of a 5-step chainShow all 5 stepsHide steps
- Step 1The ArchivistLevel 60 · Duke Nicholas ZverenhoffEastern Plaguelands81.4, 59.8
- Step 2The Truth Comes Crashing DownLevel 60 · ItemStarts from a looted itemHead of Balnazzar
- This questAbove and BeyondLevel 60 · Duke Nicholas ZverenhoffEastern Plaguelands81.4, 59.8
- Next · Step 4Lord Maxwell TyrosusLevel 60 · Duke Nicholas ZverenhoffEastern Plaguelands81.4, 59.8
- Next · Step 5The Argent HoldLevel 60 · Lord Maxwell TyrosusEastern Plaguelands81.7, 58.0
- Accept at level
- 55
- Quest level
- 60
- Where it starts
- Outside the dungeon: pick it up first
How to Complete It
- Pick up first
- CompleteVenture to Stratholme and destroy Baron Rivendare. Take his head and return to Duke Nicholas Zverenhoff.
Houses of the Holy
Accept at level 55Both factionsPick up firstTravel to Stratholme, in the north. Search the supply crates that litter the city and recover 5 Stratholme Holy Water. Return to Leonid Barthalomew the Revered when you have collected enough of the blessed fluid.Pick up fromLeonid Barthalomew the ReveredEastern Plaguelands81.7, 57.8Quest details
- Accept at level
- 55
- Quest level
- 60
- Where it starts
- Outside the dungeon: pick it up first
How to Complete It
- Pick up first
- CompleteTravel to Stratholme, in the north. Search the supply crates that litter the city and recover 5 Stratholme Holy Water. Return to Leonid Barthalomew the Revered when you have collected enough of the blessed fluid.
The Active Agent
Accept at level 55Both factionsPick up firstChain 2/2Travel to Stratholme and search the ziggurats. Find and return new Scourge Data to Betina Bigglezink.Pick up fromBetina BigglezinkEastern Plaguelands81.5, 59.7Quest details
Quest chainStep 2 of a 2-step chainShow all 2 stepsHide steps
- Step 1The Flesh Does Not LieLevel 60 · Betina BigglezinkEastern Plaguelands81.5, 59.7
- This questThe Active AgentLevel 60 · Betina BigglezinkEastern Plaguelands81.5, 59.7
- Accept at level
- 55
- Quest level
- 60
- Where it starts
- Outside the dungeon: pick it up first
How to Complete It
- Pick up first
- CompleteTravel to Stratholme and search the ziggurats. Find and return new Scourge Data to Betina Bigglezink.
The Archivist
Accept at level 55Both factionsPick up firstChain 1/5Travel to Stratholme and find Archivist Galford of the Scarlet Crusade. Destroy him and burn down the Scarlet Archive.Pick up fromDuke Nicholas ZverenhoffEastern Plaguelands81.4, 59.8Quest details
Quest chainStarts a 5-step chainShow all 5 stepsHide steps
- This questThe ArchivistLevel 60 · Duke Nicholas ZverenhoffEastern Plaguelands81.4, 59.8
- Next · Step 2The Truth Comes Crashing DownLevel 60 · ItemStarts from a looted itemHead of Balnazzar
- Next · Step 3Above and BeyondLevel 60 · Duke Nicholas ZverenhoffEastern Plaguelands81.4, 59.8
- Next · Step 4Lord Maxwell TyrosusLevel 60 · Duke Nicholas ZverenhoffEastern Plaguelands81.4, 59.8
- Next · Step 5The Argent HoldLevel 60 · Lord Maxwell TyrosusEastern Plaguelands81.7, 58.0
- Accept at level
- 55
- Quest level
- 60
- Where it starts
- Outside the dungeon: pick it up first
How to Complete It
- Pick up first
- CompleteTravel to Stratholme and find Archivist Galford of the Scarlet Crusade. Destroy him and burn down the Scarlet Archive.
The Flesh Does Not Lie
Accept at level 55Both factionsPick up firstChain 1/2Recover 10 Plagued Flesh Samples from Stratholme and return them to Betina Bigglezink. You suspect that any creature in Stratholme would have said flesh sample.Pick up fromBetina BigglezinkEastern Plaguelands81.5, 59.7Quest details
Quest chainStarts a 2-step chainShow all 2 stepsHide steps
- This questThe Flesh Does Not LieLevel 60 · Betina BigglezinkEastern Plaguelands81.5, 59.7
- Next · Step 2The Active AgentLevel 60 · Betina BigglezinkEastern Plaguelands81.5, 59.7
- Accept at level
- 55
- Quest level
- 60
- Where it starts
- Outside the dungeon: pick it up first
How to Complete It
- Pick up first
- CompleteRecover 10 Plagued Flesh Samples from Stratholme and return them to Betina Bigglezink. You suspect that any creature in Stratholme would have said flesh sample.
The Great Fras Siabi
Accept at level 55Both factionsPick up firstFind Fras Siabi's smoke shop in Stratholme and recover a box of Siabi's Premium Tobacco. Return to Smokey LaRue when the job is done.Pick up fromSmokey LaRueEastern Plaguelands80.6, 58.0Quest details
- Accept at level
- 55
- Quest level
- 60
- Where it starts
- Outside the dungeon: pick it up first
How to Complete It
- Pick up first
- CompleteFind Fras Siabi's smoke shop in Stratholme and recover a box of Siabi's Premium Tobacco. Return to Smokey LaRue when the job is done.
The Restless Souls
Accept at level 55Both factionsPick up firstChain 1/2Find Egan. You only know that he was last seen around Stratholme.Pick up fromCaretaker AlenEastern Plaguelands79.5, 63.9Quest details
Quest chainStarts a 2-step chainShow all 2 stepsHide steps
- This questThe Restless SoulsLevel 60 · Caretaker AlenEastern Plaguelands79.5, 63.9
- Next · Step 2The Restless SoulsLevel 60 · EganEastern Plaguelands14.4, 33.7
- Accept at level
- 55
- Quest level
- 60
- Where it starts
- Outside the dungeon: pick it up first
How to Complete It
- Pick up first
- CompleteFind Egan. You only know that he was last seen around Stratholme.
The Restless Souls
Accept at level 55Both factionsPick up firstChain 2/2Use Egan's Blaster on the ghostly and spectral citizens of Stratholme. When the restless souls break free from their ghostly shells, use the blaster again - freedom will be theirs! Free 15 Restless Souls and return to Egan.Pick up fromEganEastern Plaguelands14.4, 33.7Quest details
Quest chainStep 2 of a 2-step chainShow all 2 stepsHide steps
- Step 1The Restless SoulsLevel 60 · Caretaker AlenEastern Plaguelands79.5, 63.9
- This questThe Restless SoulsLevel 60 · EganEastern Plaguelands14.4, 33.7
- Accept at level
- 55
- Quest level
- 60
- Where it starts
- Outside the dungeon: pick it up first
How to Complete It
- Pick up first
- CompleteUse Egan's Blaster on the ghostly and spectral citizens of Stratholme. When the restless souls break free from their ghostly shells, use the blaster again - freedom will be theirs! Free 15 Restless Souls and return to Egan.
Starts Inside the Dungeon 2
Nothing to prepare: an NPC inside hands these out, or an item you loot starts them along the way.
Aurius' Reckoning
Accept at level 55Both factionsStarts insideChain 2/2Defeat Baron Rivendare and complete Aurius' reckoning.Pick up fromAurius Inside Stratholme
Quest details
Quest chainStep 2 of a 2-step chainShow all 2 stepsHide steps
- Step 1The Medallion of FaithLevel 60 · AuriusInside Stratholme
- This questAurius' ReckoningLevel 60 · AuriusInside Stratholme
- Accept at level
- 55
- Quest level
- 60
- Where it starts
- Inside the dungeon
How to Complete It
- Pick up inside
- CompleteDefeat Baron Rivendare and complete Aurius' reckoning.
The Truth Comes Crashing Down
Accept at level 55Both factionsItem starts itChain 2/5Take the Head of Balnazzar to Duke Nicholas Zverenhoff in the Eastern Plaguelands.Use itemHead of BalnazzarStarts from a looted itemHead of BalnazzarQuest details
Quest chainStep 2 of a 5-step chainShow all 5 stepsHide steps
- Step 1The ArchivistLevel 60 · Duke Nicholas ZverenhoffEastern Plaguelands81.4, 59.8
- This questThe Truth Comes Crashing DownLevel 60 · ItemStarts from a looted itemHead of Balnazzar
- Next · Step 3Above and BeyondLevel 60 · Duke Nicholas ZverenhoffEastern Plaguelands81.4, 59.8
- Next · Step 4Lord Maxwell TyrosusLevel 60 · Duke Nicholas ZverenhoffEastern Plaguelands81.4, 59.8
- Next · Step 5The Argent HoldLevel 60 · Lord Maxwell TyrosusEastern Plaguelands81.7, 58.0
- Accept at level
- 55
- Quest level
- 60
- Where it starts
- An item starts it: Head of Balnazzar
How to Complete It
- Use itemHead of Balnazzar
- CompleteTake the Head of Balnazzar to Duke Nicholas Zverenhoff in the Eastern Plaguelands.
Leads Here from Outside 3
The quests that point you to this dungeon or wrap up the story afterwards. Fit them in around your run to finish each chain.
Demon Dogs
Accept at level 52Both factionsPick up firstSlay 20 Plaguehound Runts, 5 Plaguehounds and 5 Frenzied Plaguehounds. Return to Tirion Fordring when the task is complete.Pick up fromTirion FordringEastern Plaguelands7.6, 43.7Quest details
- Accept at level
- 52
- Quest level
- 56
- Where it starts
- Outside the dungeon: pick it up first
How to Complete It
- Pick up first
- CompleteSlay 20 Plaguehound Runts, 5 Plaguehounds and 5 Frenzied Plaguehounds. Return to Tirion Fordring when the task is complete.
Of Lost Honor
Accept at level 52Both factionsPick up firstTravel to Northdale, in the northeastern region of the Eastern Plaguelands, and recover the Symbol of Lost Honor. Return to Tirion Fordring upon completion of your objective.Requires firstOf Forgotten MemoriesPick up fromTirion FordringEastern Plaguelands7.6, 43.7Quest details
- Accept at level
- 52
- Quest level
- 58
- Where it starts
- Outside the dungeon: pick it up first
How to Complete It
- Pick up first
- CompleteTravel to Northdale, in the northeastern region of the Eastern Plaguelands, and recover the Symbol of Lost Honor. Return to Tirion Fordring upon completion of your objective.
Eitrigg's Wisdom
Accept at level 55HordePick up firstSpeak with Eitrigg in Orgrimmar. When you have discussed matters with Eitrigg, seek council from Thrall. You recall having seen Eitrigg in Thrall's chamber.Requires firstWarlord's CommandPick up fromWarlord Goretooth Badlands5.8, 47.5
Quest details
- Accept at level
- 55
- Quest level
- 60
- Where it starts
- Outside the dungeon: pick it up first
- Dungeons
- Stratholme · Stratholme
How to Complete It
- Pick up first
- CompleteSpeak with Eitrigg in Orgrimmar. When you have discussed matters with Eitrigg, seek council from Thrall. You recall having seen Eitrigg in Thrall's chamber.
Stratholme Bosses & Loot
11 bosses wait in Stratholme Main Gate.
9 bosses wait in Stratholme Service Gate.
19 bosses wait in Stratholme.
- 01Hearthsinger Forresten
 Magister's Boots
 Songbird Blouse
 Rainbow Girdle
 Woollies of the Prancing Minstrel
 Piccolo of the Flaming Fire
- 02Timmy the Cruel
 Lightforge Gauntlets
 Vambraces of the Sadist
 Timmy's Galoshes
 Grimgore Noose
 The Cruel Hand of Timmy
- 03Malor the Zealous
 Medallion of Faith
- 04Cannon Master Willey
 Shadowcraft Spaulders
 Plans: Heartseeker
 Helm of the New Moon
 Nacreous Shell Necklace
 Mantle of the Scarlet Crusade
 Barrage Girdle
 Master Cannoneer Boots
 Cannonball Runner
 Willey's Portable Howitzer
 Miniature Cannon Balls
 Willey's Back Scratcher
 Redemption
- 05Archivist Galford
 Devout Gloves
 Foresight Girdle
 Righteous Orb
 Tome of Conjure Food VII
 Archivist Cape
 Ash Covered Boots
 Tome of Knowledge
- 06Balnazzar
- Pattern: Truefaith Vestments
 Lightforge Boots
 Shroud of the Nathrezim
 Recipe: Flask of Distilled Wisdom
 Head of Balnazzar
 Book of the Dead
 Crown of Tyranny
 Grand Crusader's Helm
 Star of Mystaria
 Wyrmtongue Shoulders
 Fire Striders
 Gift of the Elven Magi
 Hammer of the Grand Crusader
 Band of Mending
 Demonshear
 Waistband of Balzaphon
- Chains of the Lich
 Staff of Balzaphon
- 07The Unforgiven
 Wildheart Gloves
 Mask of the Unforgiven
 Wailing Nightbane Pauldrons
 Tearfall Bracers
 Soul Breaker
- 08Baroness Anastari
- Dreadmist Sandals
 Anastari Heirloom
 Shadowy Laced Handwraps
 Screeching Bow
 Banshee Finger
 Windshrieker Pauldrons
 Coldtouch Phantom Wraps
 Chillhide Bracers
 Banshee's Touch
- Wail of the Banshee
- 09Nerub'enkan
 Beaststalker's Boots
- Thuzadin Sash
 Chitinous Plate Legguards
 Carapace Spine Crossbow
 Husk of Nerub'enkan
 Acid-etched Pauldrons
 Darkspinner Claws
 Crypt Stalker Leggings
- Fangdrip Runners
 Eye of Arachnida
- 10Maleki the Pallid
- Devout Sandals
 Clutch of Foresight
- Plans: Hammer of the Titans
 Pale Moon Cloak
 Maleki's Footwraps
 Skull of Burning Shadows
 Bone Slicing Hatchet
 Twilight Void Bracers
 Darkbind Fingers
 Flamescarred Girdle
- Lavawalker Greaves
- 11Magistrate Barthilas
 Death Grips
 Key to the City
 Crimson Felt Hat
 Royal Tribunal Cloak
 Magistrate's Cuffs
 Idol of Brutality
 Peacemaker
- 12Ramstein the Gorger
 Gauntlets of Valor
 Animated Chain Necklace
- Soulstealer Mantle
 Band of Flesh
 Ramstein's Lightning Bolts
 Crest of Retribution
 Slavedriver's Cane
- 13Baron Rivendare
 Deathcharger's Reins
 Cape of the Black Baron
 Devout Skirt
 Magister's Leggings
- Dreadmist Leggings
 Shadowcraft Pants
- Wildheart Kilt
 Beaststalker's Pants
- Kilt of Elements
- Lightforge Legplates
- Legplates of Valor
 Runeblade of Baron Rivendare
 Helm of the Executioner
- Thuzadin Mantle
 Robes of the Exalted
 Tunic of the Crescent Moon
- Dracorian Gauntlets
 Gauntlets of Deftness
 Seal of Rivendare
 Ritssyn's Wand of Bad Mojo
 Scepter of the Unholy
 Bonescraper
 Skullforge Reaver
- 14Black Guard Swordsmith
 Bottom Half of Advanced Armorsmithing: Volume III
- 15Crimson Hammersmith
 Bottom Half of Advanced Armorsmithing: Volume II
- 16Ezra Grimm
- 17Postmaster Malown
- 18Skul
- 19Stonespine
- Stoneskin Gargoyle Cape
- Verdant Footpads
- Gargoyle Shredder Talons
Rare Spawns and Other Drops
- Stratholme Courier
 Crusaders' Square Postbox Key
- Elders' Square Postbox Key
- Festival Lane Postbox Key
- Ezra Grimm's Postbox Key
- King's Square Postbox Key
- Market Row Postbox Key
- Trash
 Devout Bracers
 Magister's Belt
 Dreadmist Belt
- Shadowcraft Bracers
 Wildheart Bracers
- Beaststalker's Bindings
 Bindings of Elements
 Lightforge Belt
 Belt of Valor
- Righteous Orb
 Frayed Abomination Stitching
 Corruptor's Scourgestone
 Invader's Scourgestone
 Minion's Scourgestone
 Formula: Enchant 2H Weapon - Major Intellect
- Formula: Enchant Weapon - Unholy Weapon
- Pattern: Ghostweave Pants
- Pattern: Runic Leather Shoulders
- Pattern: Wicked Leather Belt
- Schematic: Ultra-Flash Shadow Reflector
- Schematic: Voice Amplification Modulator
- Plans: Serenity
- Plans: Corruption
- Balzaphon
- Chains of the Lich
- Trash mobs
- Devout Bracers
- Magister's Belt
- Dreadmist Belt
- Shadowcraft Bracers
- Wildheart Bracers
- Beaststalker's Bindings
- Bindings of Elements
- Lightforge Belt
- Belt of Valor
- Righteous Orb
- Frayed Abomination Stitching
- Corruptor's Scourgestone
- Invader's Scourgestone
- Minion's Scourgestone
 Stratholme Militia Shoulderguard
 Gracious Cape
- Juno's Shadow
- Morlune's Bracer
 Plaguebat Fur Gloves
 Sacred Cloth Leggings
 Plaguehound Leggings
- Formula: Enchant 2H Weapon - Major Intellect
- Formula: Enchant Weapon - Unholy Weapon
- Pattern: Ghostweave Pants
- Pattern: Runic Leather Shoulders
- Pattern: Wicked Leather Belt
- Schematic: Ultra-Flash Shadow Reflector
- Schematic: Voice Amplification Modulator
- Lightforge Boots
- Star of Mystaria
- Demonshear
- Wyrmtongue Shoulders
- Crown of Tyranny
- Gift of the Elven Magi
- Fire Striders
- Hammer of the Grand Crusader
- Grand Crusader's Helm
- Shroud of the Nathrezim
- Plans
- Plans: Serenity
- Plans: Corruption
- Skul
 Skul's Fingerbone Claws
 Skul's Cold Embrace
- Skul's Ghastly Touch
- Postmaster Malown
 The Postmaster's Band
 The Postmaster's Tunic
- The Postmaster's Trousers
- The Postmaster's Treads
 The Postmaster's Seal
 Malown's Slam
- Plans and patterns
- Plans: Serenity
- Plans: Corruption
- Atiesh
 Andonisus, Reaper of Souls
- Sothos and Jarien
- Amulet of the Redeemed
 Ironweave Robe
- Legplates of Vigilance
- Band of Mending
- Scepter of Interminable Focus
Where Is the Stratholme Entrance?
- ContinentEastern Kingdoms
- ZoneEastern Plaguelands Levels 54–59 · Contested territory
- Nearest flight pathPlaguewood Tower, Eastern Plaguelands Both factions · 18.4, 24.2
- Entrance26.1, 10.4
Stratholme Common Questions
Where is the Stratholme entrance in WoW Forever?
The Stratholme entrance is in Eastern Plaguelands at 26.1, 10.4 on Eastern Kingdoms. The nearest flight path is Plaguewood Tower at 18.4, 24.2.
What level do you need for Stratholme?
Stratholme is a 5-player dungeon for level 55–60 characters. The surrounding zone, Eastern Plaguelands, is levels 54–59.
How many bosses are in Stratholme?
Stratholme has 19 bosses: Hearthsinger Forresten, Timmy the Cruel, Malor the Zealous, Cannon Master Willey, Archivist Galford, Balnazzar, The Unforgiven, Baroness Anastari, Nerub'enkan, Maleki the Pallid and 9 more. The boss list on this page shows each one's loot.
What quests are there for Stratholme?
This page lists 10 Stratholme quests, including Above and Beyond, Aurius' Reckoning, Houses of the Holy and The Active Agent. 8 of them must be picked up before you enter, and 2 start inside; 3 more lead-in quests point you here from outside.
What are the Stratholme wings and their levels?
Stratholme splits into 2 sections: Main Gate (58–60) and Service Gate (58–60). Use the section switcher to see only that section's bosses, quests and loot.